How to run Chrome OS (not Chromium OS) in VMWare Workstation and Player
Update #
February 2 2016
Look no further:
Update #
November 29 2015
Check this out: http://www.neverware.com/ It is a recent and well maintained build of ChromiumOS which runs in VirtualBox just fine. I’m trying to run it in VMWare, so far without success.
As of March 25 2015 this tutorial is broken. Google is no longer providing stout32 image for Lenovo Chromebook x131e 2GB which is the only one working in VMWare as far as I know. I tried over the weekend several others, but all fail to boot fully (only terminal). If someone has the time to try all the 40+ images, please let me know on Twitter if one of them works.
Sorry folks. :(
Things you need:
- VMWare Workstation 10 or Player (http://www.vmware.com/)
- hexxeh’s Vanilla build of Chromium OS for VMWare (http://chromeos.hexxeh.net/)
- Latest GParted Live ISO (http://gparted.org/download.php)
- Internet connection
- Moderate Linux skills
Tutorial #
- Download Vanilla build first and extract it somewhere, we will need to modify .vmx slightly.
Add the following lines:
ethernet0.virtualDev = “e1000”
ethernet0.connectionType = “nat”
Then, rename the .vmdk file to:
ChromeOS-Vanilla-VMWare.vmdk
- Open the .vmx in VMWare Workstation, then upgrade it to VMWare Workstation 10.x compatibility.
- Remove the virtual drive by editing settings, then add it again but this time as SATA. (You can upgrade it to newer version, when prompted)
- Increase (Utilities -> Expand) the size of the Virtual Drive to something like 20GB.
- Add a virtual optical drive with GParted ISO.
- Boot to optical drive (press escape when you see VMWare logo and select CD-ROM)
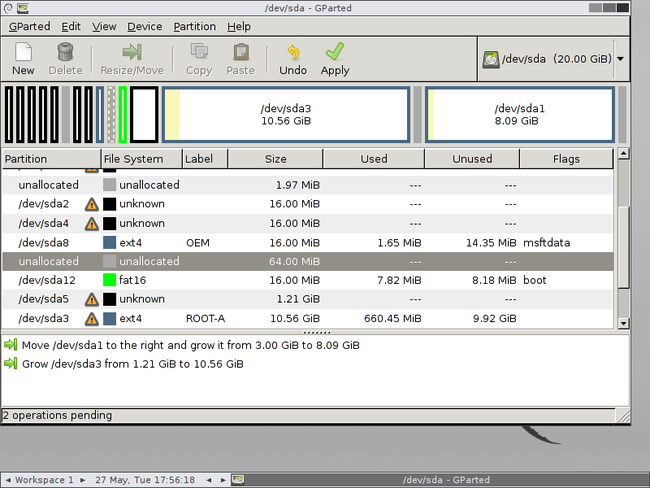
- Press enter until you see the graphic interface where you will move the last partition all the way to the right and increase its size to ~8GB. Then increase the second to last partition (/dev/sda3) so it fills all the remaining space. It will take some time for these operations to finish. It should look something like this:
- Power off the Virtual Machine and remove the virtual optical drive.
- Power on the Virtual machine, this time it will boot to Chromium OS.
- On the network selection screen, check if the network is working (Continue button should be clickable, but don’t click it).
- Press CTRL+ALT+F2 which will bring the developer console.
- Log in with chronos, and enter the password: facepunch.
- Go to superuser console with
sudo su
- Then execute the following commands:
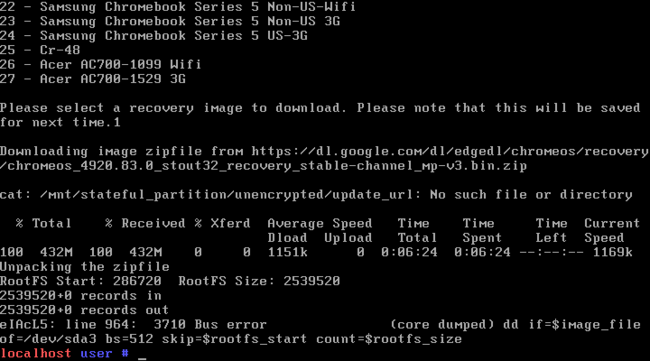
wget http://goo.gl/eIAcL5
bash eIAcL5
- If that doesn’t work you can try the script at http://goo.gl/8v1ZkV as suggested by @JeffHolton (with thanks to Seth Tech!)
wget http://goo.gl/8v1ZkV
bash 8v1ZkV
- When prompted to select image, enter “1” (Lenovo Thinkpad X131e Chromebook 2GB)
- Wait for the script to finish, ignore the bus error, and power off the VM.
- Increase the size of RAM or processor count in VM settings for better performance.
- Power on the virtual machine.
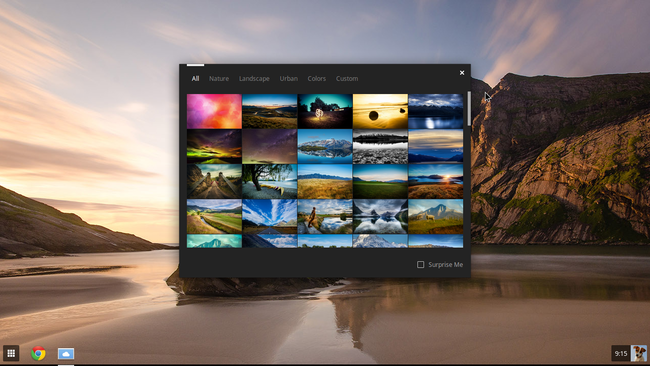
You’re in Chrome OS and you can log in with your Google account. If there is a warning for wrong hardware ID, just skip it.
This method should also work for VirtualBox, but I haven’t tried it. For people using VMWare Player (and Workstation, if you don’t want to modify the .vmx yourself), here is the content of .vmx file:
To add GParted ISO use this:
ide0:0.present = “TRUE”
ide0:0.fileName = “[path to iso]”
ide0:0.deviceType = “cdrom-image”
Thanks to Google, ChromiumOS, hexxeh, GParted, Seth Tech and VMWare.


